Video Wall
Video Wall is a tool within the Evercam platform that lets teams view multiple live camera feeds on a single screen. It provides an at-a-glance overview of activity across different areas of a site, helping teams monitor progress, coordination, and conditions without switching between individual cameras.

How to Use the Video Wall
1. Open the Video Wall
- Click the Video Wall tab in the left-hand navigation menu.
- This opens the wall view showing all cameras for either:
- All projects (if accessed from the dashboard)
- A specific project (if accessed from within a project)
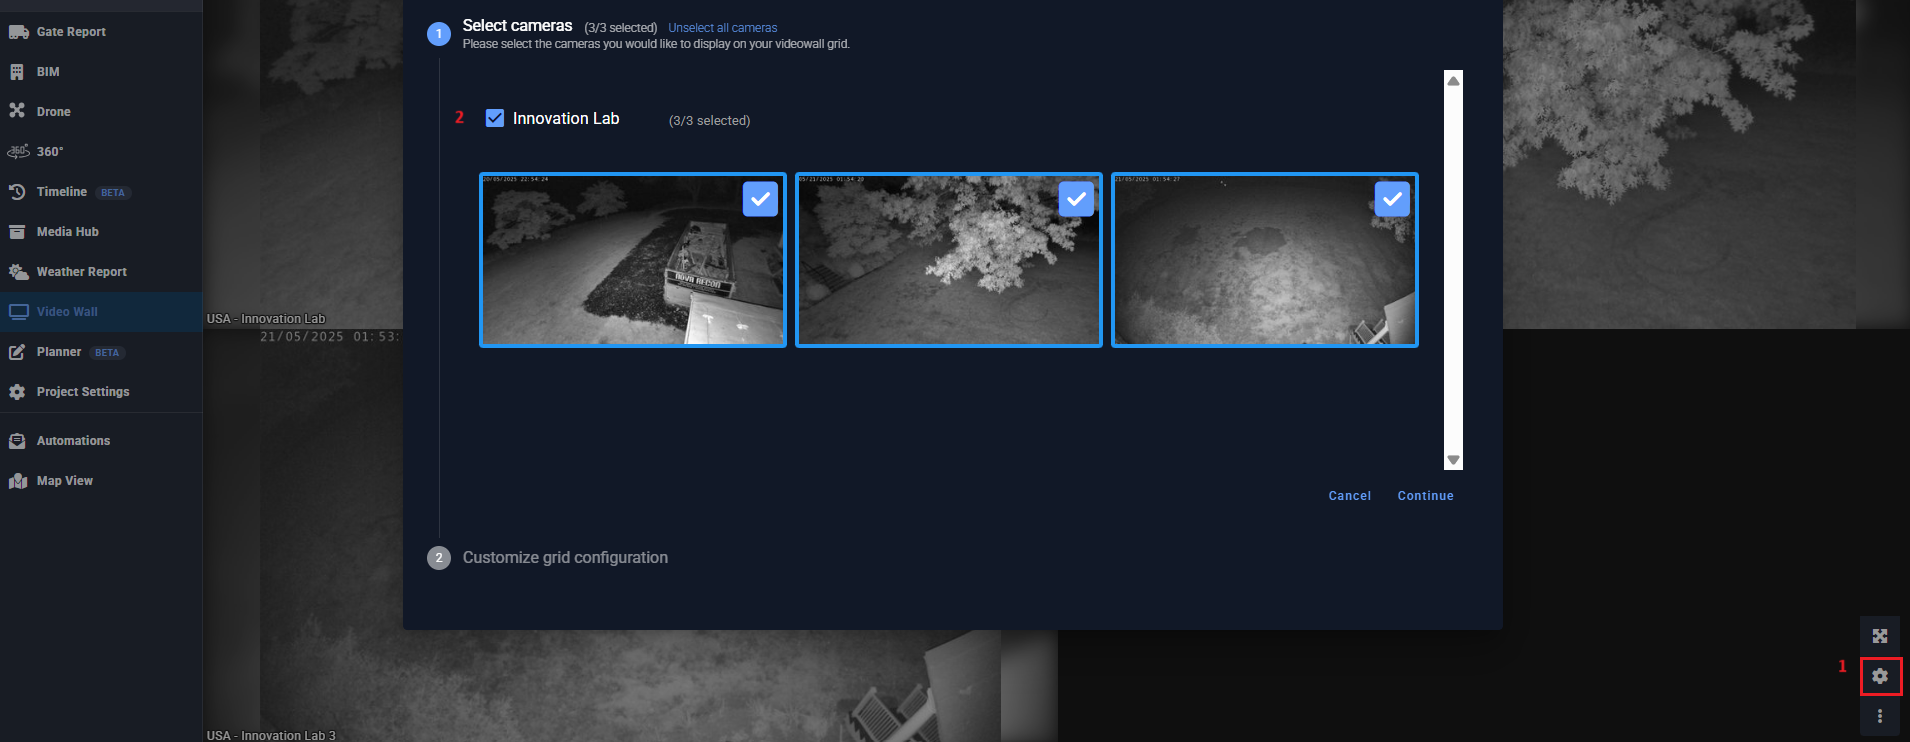
2. Configure the Video Wall
What it does: Lets you choose which cameras to display and how they are arranged.
How to use:
- Click the gear icon (Configure) at the bottom right corner of the Video Wall screen.
- In the configuration panel, you can:
- Select cameras from your project(s)
- Drag and drop cameras into position on the grid
- Resize and arrange views to fit your preferred layout
- Once done, click Save — the layout will update instantly.
3. Monitor Your Project
What it does: Provides live visual updates in a unified display.
How to use:
- After saving your configuration, the grid will refresh automatically.
- Use the wall to observe real-time conditions across multiple locations.
- Note: The images update every 50 seconds by default to maintain performance.
Access & Permissions
What it does: Ensures that the Video Wall is only visible to users with permission.
How to use:
- The Video Wall must be enabled per user.
- Contact your Evercam Account Manager to enable this feature.
- Once enabled, any device using that user’s login can access the Video Wall.
Notes & Expectations
- Image Quality: Slightly reduced compared to Live View, to optimize speed and performance.
- Refresh Rate: 1 new image (JPEG) every 50 seconds per camera.
- Visibility: Cameras shown depend on whether you access it from the overall dashboard (all projects) or within a specific project (only project cameras).
Need More Details?
Read the full guide in our User Manual.
[[cta]]