Sharing the Camera
Sharing is a feature within the Evercam platform that allows users to control who can access live and recorded camera views. By sharing a camera, teams can provide visibility to colleagues or external stakeholders while maintaining control through permission-based access, ensuring the right level of visibility for each user.
Sharing simplifies collaboration by allowing you to share snapshots and videos with stakeholders. Whether for routine updates or critical decision-making, this feature ensures that all parties are informed and engaged.
How to Share a Camera
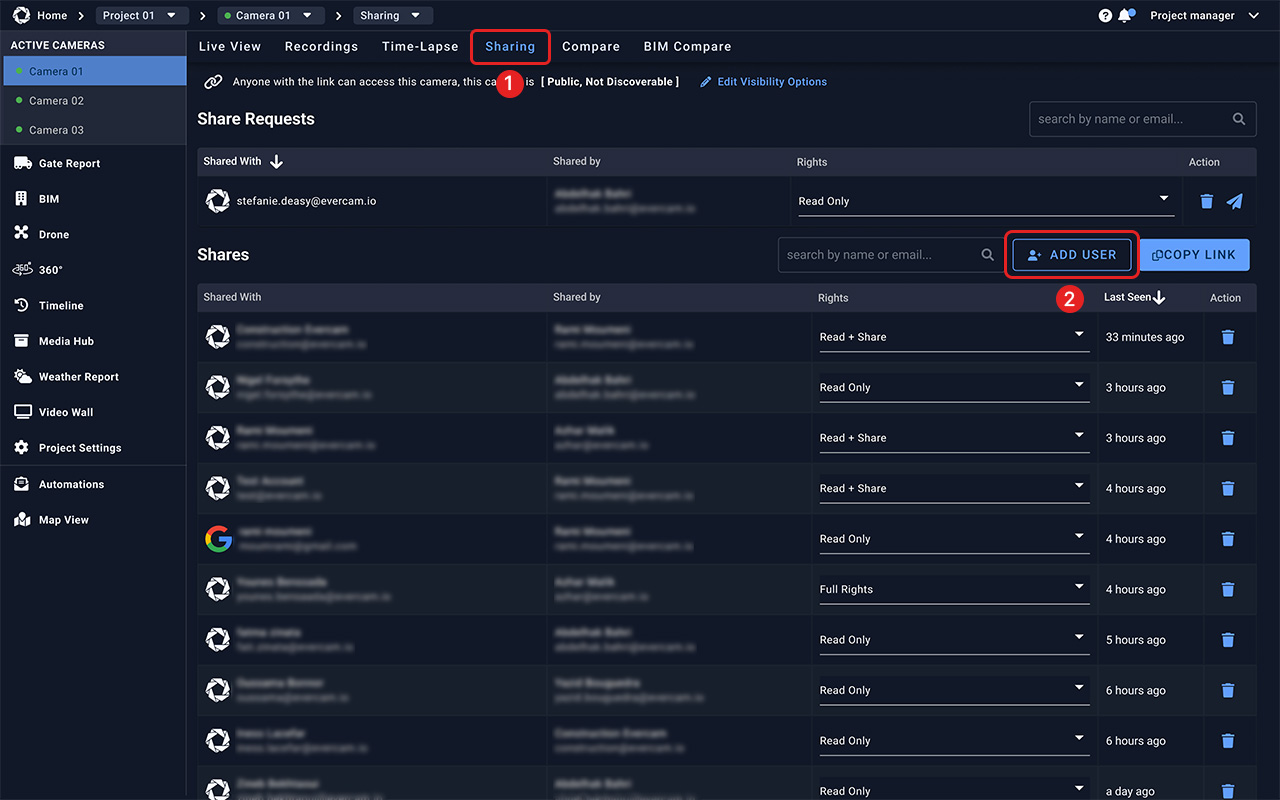
1. Click the Sharing tab at the top of the Evercam dashboard.
Note: You won’t see this tab if you have read-only access.
2. Press Add User and enter the email addresses of the people you want to share the camera with.
3. Add an optional message for the recipients.
4. Choose the permission level for each user:
- Read + Share – View cameras and share access with others.
- Read Only – View cameras but cannot share or manage users.
5. Click Share to complete sharing.

Managing Access
- Remove a User: Click the Trash Bin icon next to their name.
- Share a Video: Click the Copy Link (available only for Public cameras).
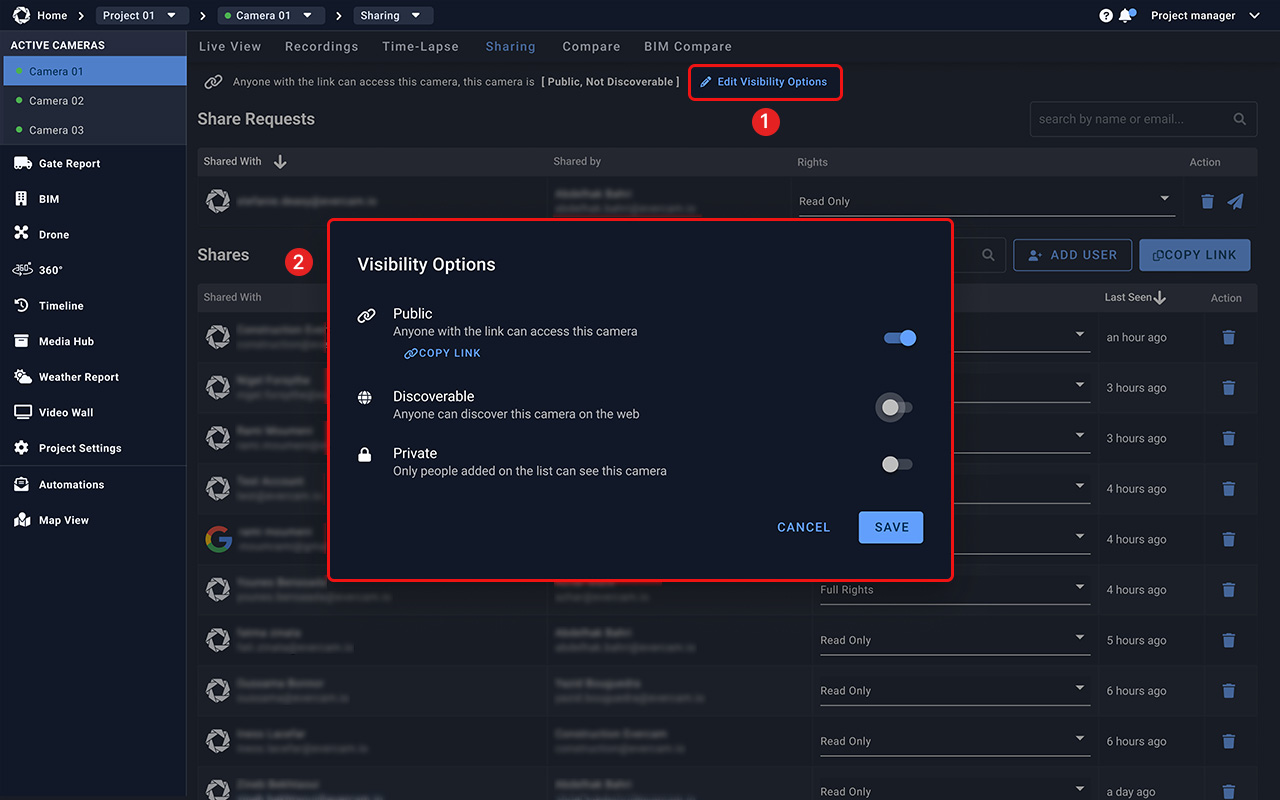
- Change Camera Visibility: Click Edit Options to set the camera as Public, Discoverable, or Private.
Need More Details?
Read the full guide in our User Manual.
[[cta]]