Recordings
Recordings lets you access and review historical footage captured by your site cameras. By navigating recordings by date and time, teams can track progress, investigate incidents, verify activities, and extract visual evidence directly from the Evercam dashboard. Recordings also serve as the entry point for advanced tools like Timeline, Compare, and Object Detection.

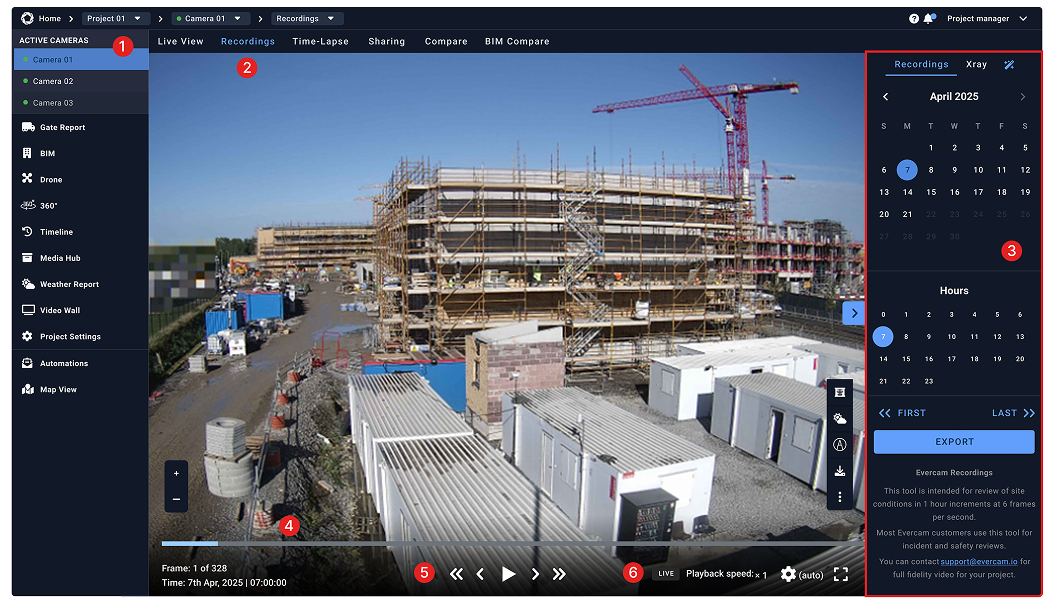
How To Use The Recordings Tool
- Select a camera from the menu on your left to view its history.
- Click the Recordings tab at the top of the Evercam dashboard.
- Use the Calendar on the right to select a date and time.
- Navigate through the selected hour using the Timeline at the bottom.
- Click Play to watch or use the < and > buttons to move frame by frame.
- Adjust the Playback Speed from 0.25x to 2.5x if needed.
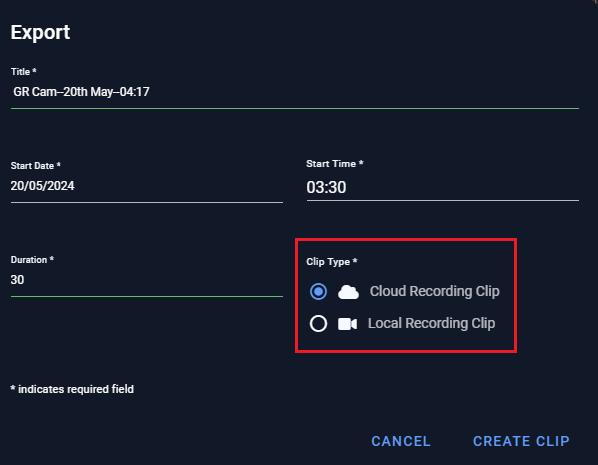
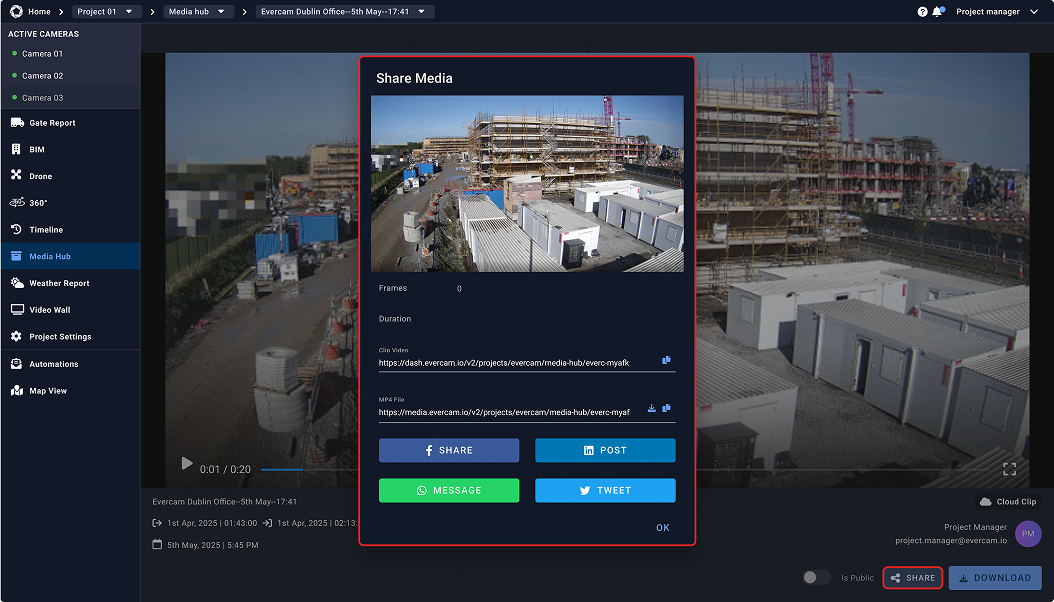
How to Export & Share a Clip
- Click Export and enter the title, start date, start time, and duration.
- Press Create Clip, and your video will be saved in the Media Hub.
- You can now download your clip, send its link, or share it directly on social media channels.
Related Tools to Help Manage Your Project
With the ability to navigate construction data across every project moment in your recordings, you can also use the X-Ray, Mark-up, and Weather tools to improve planning, progress reporting, and project communication.
Need More Details?
Read the full guide in our User Manual.
[[cta]]